How to choose, frame, and hang art in your home? I was called to do just that with new clients. They had just moved residences, had done quite a bit of decorating, and wanted to give the finishing touches to make the house a home. As an artist I have had much experience choosing, framing, and hanging art and I was thrilled to work on this assignment.
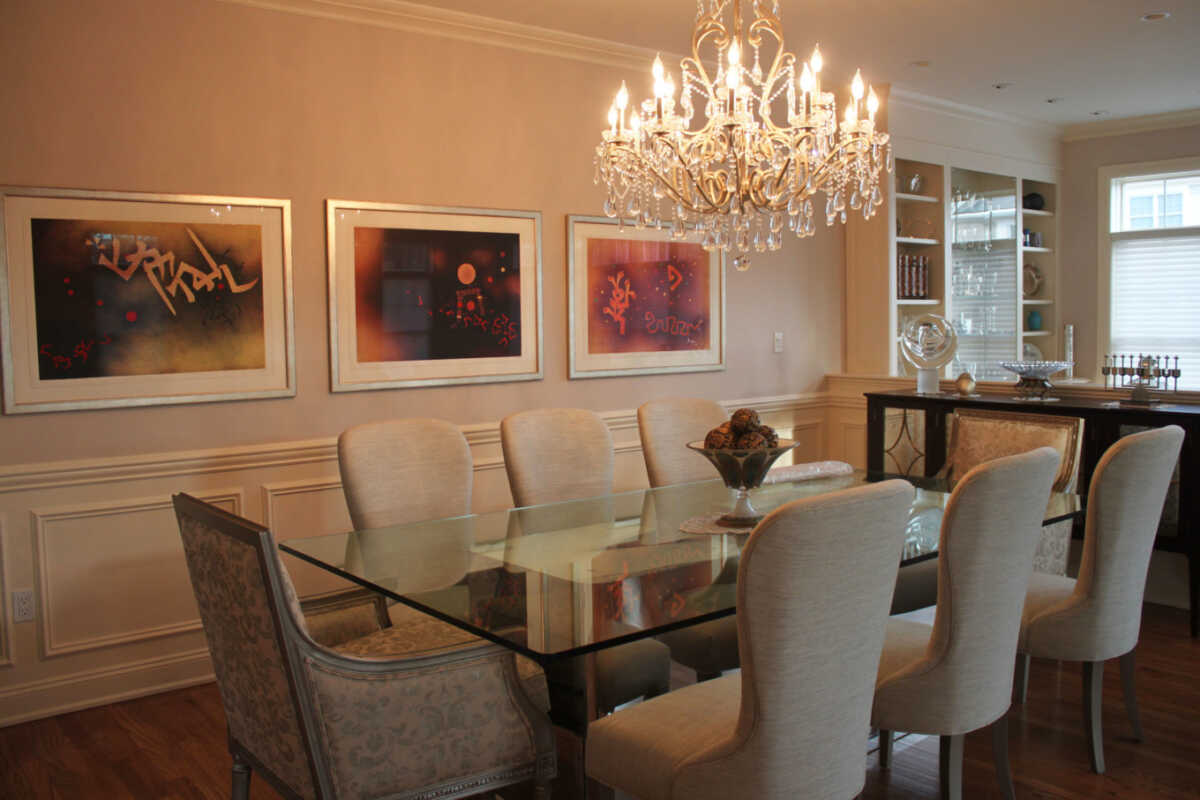
We started with the dining room which was decorated with a neutral palette. We first looked at the art the couple owned to see what we could use and what the client really liked. There was one long wall to hang art in the dining room. The couple had several large lithographs, part of a suite created by one artist that had never been displayed. They had beautiful deep colors and an abstract design that led your eye from one piece to the next. The deep colors would be a nice contrast with the light furniture and walls. We chose 3 and had them matted and framed.
Because this was quality art the mats we used were archival to protect the art. We matched the white edge of the paper with a white mat to simplify the framing and make the art stand out. Then we chose a wood frame with a metallic finish that picked up the colors of the chandelier. Hanging the 3 pieces was fairly straight forward. First we found the center of the wall to hang the middle piece and then hung the other 2 pieces equidistant from the the center one. As for height, a general rule is that the center of the art should be 60″ from the floor. The results were lovely as you can see.
Choosing and Hanging Art in Dining Room
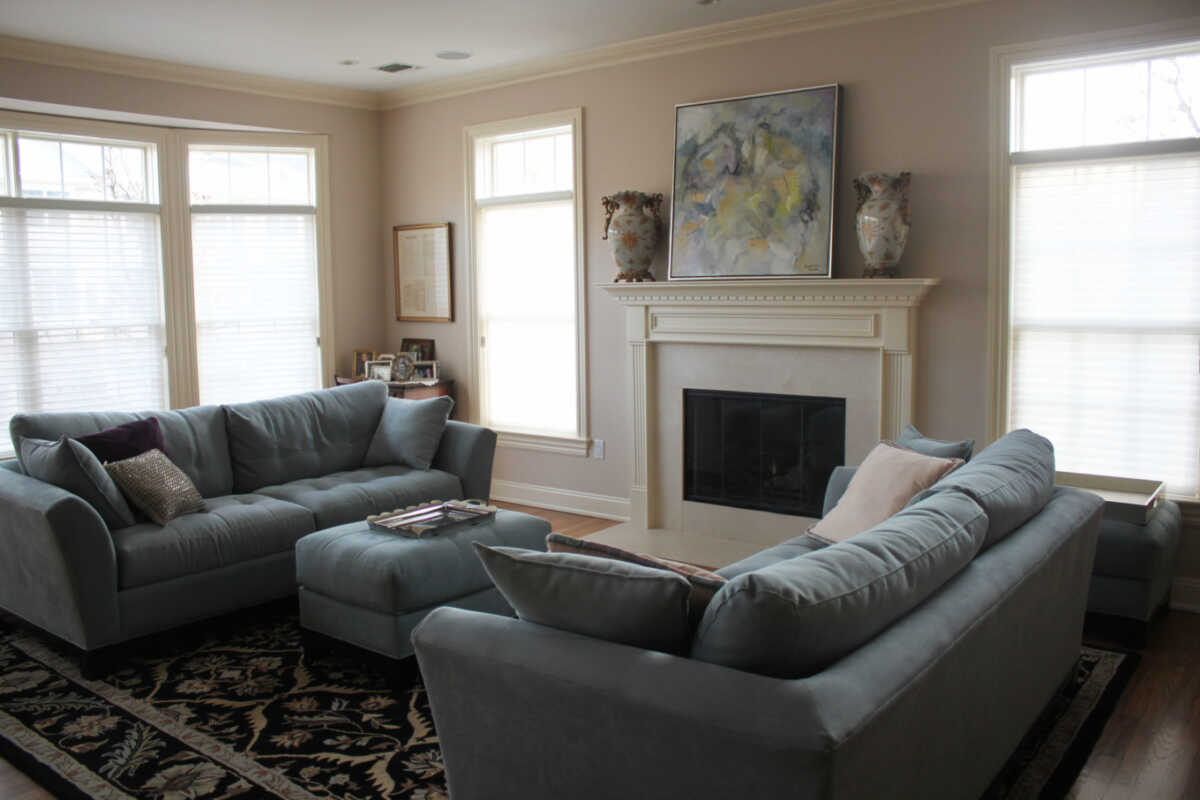
Next came the living room. There was a fireplace mantel that called out for a work of art. The couple had 2 traditional porcelain vases that were displayed on either side. But what to put in the center? I suggested an oil painting that we could leave resting on the mantel rather than hanging it which would be different. I also felt that an abstract painting would work well with the decor and the other art the couple had.
First I measured the distance between the 2 vases and determined that an art piece between 30-36″ would be appropriate. Next came the hard part of finding the perfect piece. Having artist friends made my task easier. Choosing several artists’ work for the couple to see narrowed the search. The internet was the way we started looking at the art. A studio visit came next and the painting was chosen. It was the perfect size, a 30″ square. The colors pick up the palette of the room. It is a warm and inviting piece. We framed it simply and it just looks beautiful.
Choosing the Perfect Oil Painting for the Living Room
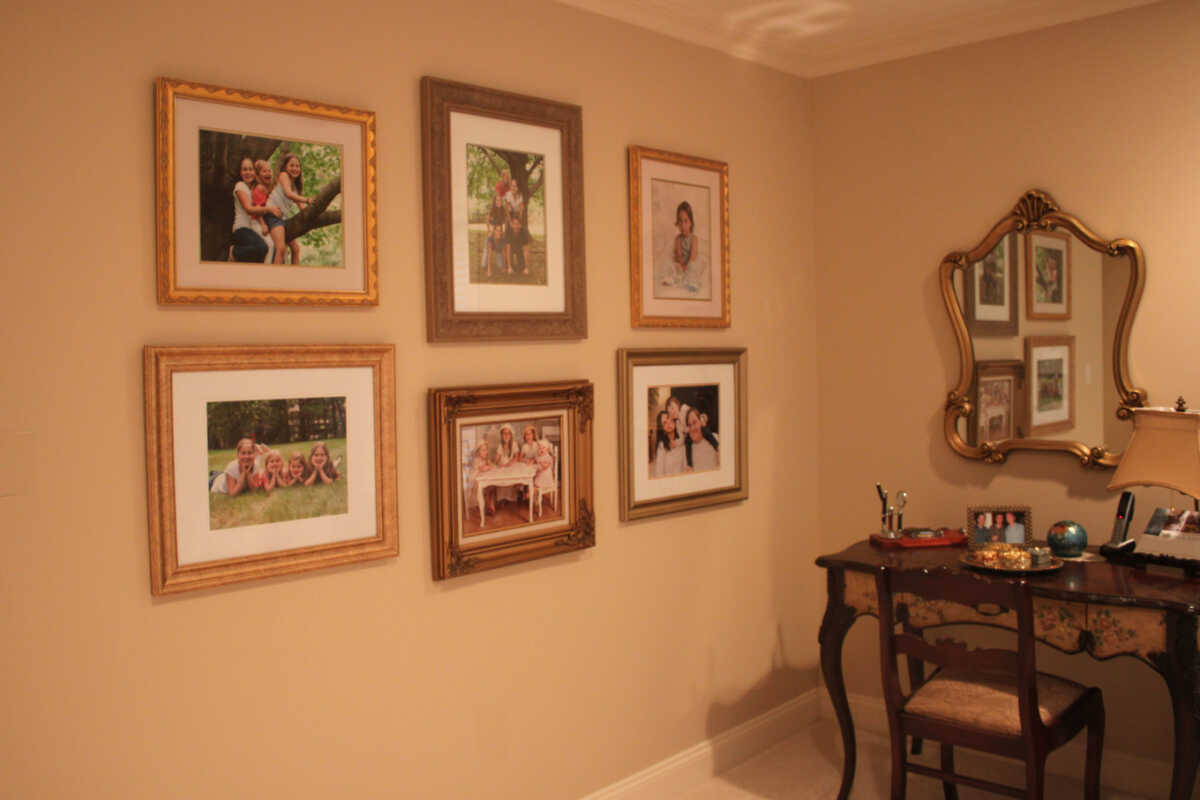
Finally, we hung an arrangement of family photos in the master bedroom. All these photos were already framed and similar in size. We had many photos to choose from and together we narrowed them down to 6. That would be the right number for the wall we had in mind. The next step was laying them out on the floor and arranging the right place for each one. When I was satisfied with the arrangement I took a photo for reference and sketched the design on paper making sure to measure the distance of each photo from the other. Then starting from the middle I worked my way out until it was done. Here are the results.
Hanging Family Photo Arrangement in Master Bedroom

